


Exploring Git Integration with Microsoft Fabric Data Warehouses
Testing Git Integration with Microsoft Fabric Data Warehouses: A Step-by-Step Guide

Introduction to Git integration
Git integration in Microsoft Fabric enables developers to seamlessly integrate their development processes, tools, and best practices directly into the Fabric platform. This integration operates at the workspace level, allowing developers to version items they develop within a workspace through a unified process, with complete visibility of all their items.
Developers working within Fabric can:
Backup and version their work and revert to previous stages when necessary
Collaborate with others or work independently using Git branches
Utilize familiar source control tools to manage Fabric items
As of the date of writing, almost all Fabric items are supported, including:
Warehouses
Data pipelines
Lakehouse
Notebooks
Paginated reports
Reports
Semantic models
Spark Job Definitions
Spark environment
Exploring Git Integration with Microsoft Fabric Data Warehouses

In this post, I will showcase steps to test the Git integration support for Microsoft Fabric Data Warehouses. Inspired by Kevin Chant posts, which provides extensive information about Git integration with Fabric, I will outline my steps to test Git integration with Fabric Data Warehouses.
Upon opening a workspace, we can see that Git integration is now supported for Data Warehouses. (Here the Git status showed as "Synced" after connecting my workspace to a Git repository and branch)

Ready to get started? Let's explore setting up Git integration and walk through syncing your Fabric data warehouse with Azure DevOps!
Steps of Configuring Git Integration:
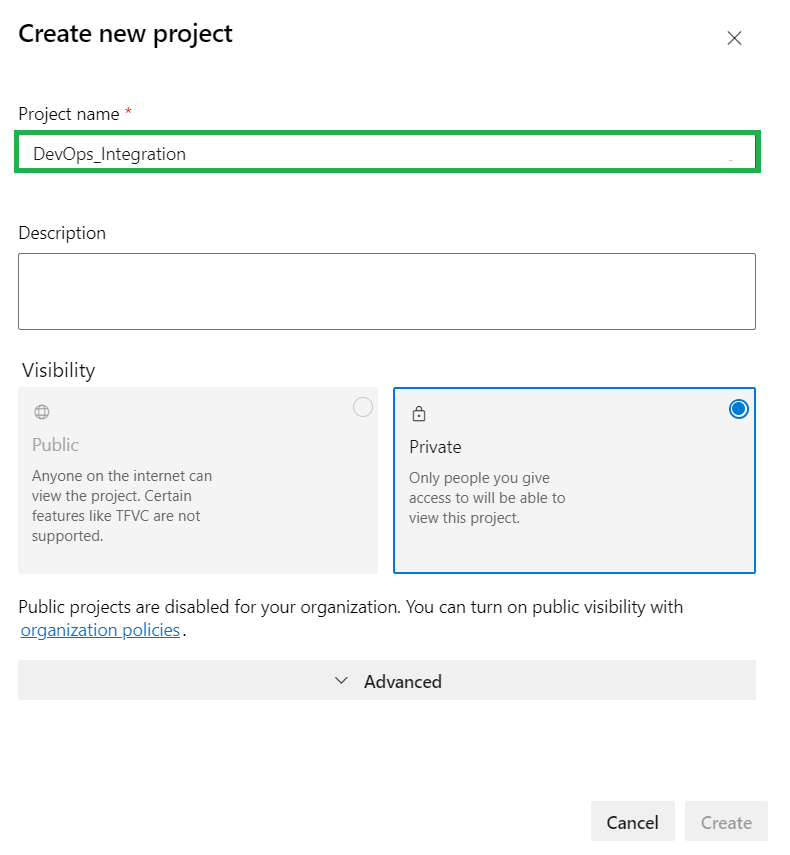
1) Create an Azure DevOps project :
Navigate to dev.azure.com and create a new project, in my case I named it “DevOps_Integration”
Initialize a main branch, by clicking on Repos => Branches= > Initialize

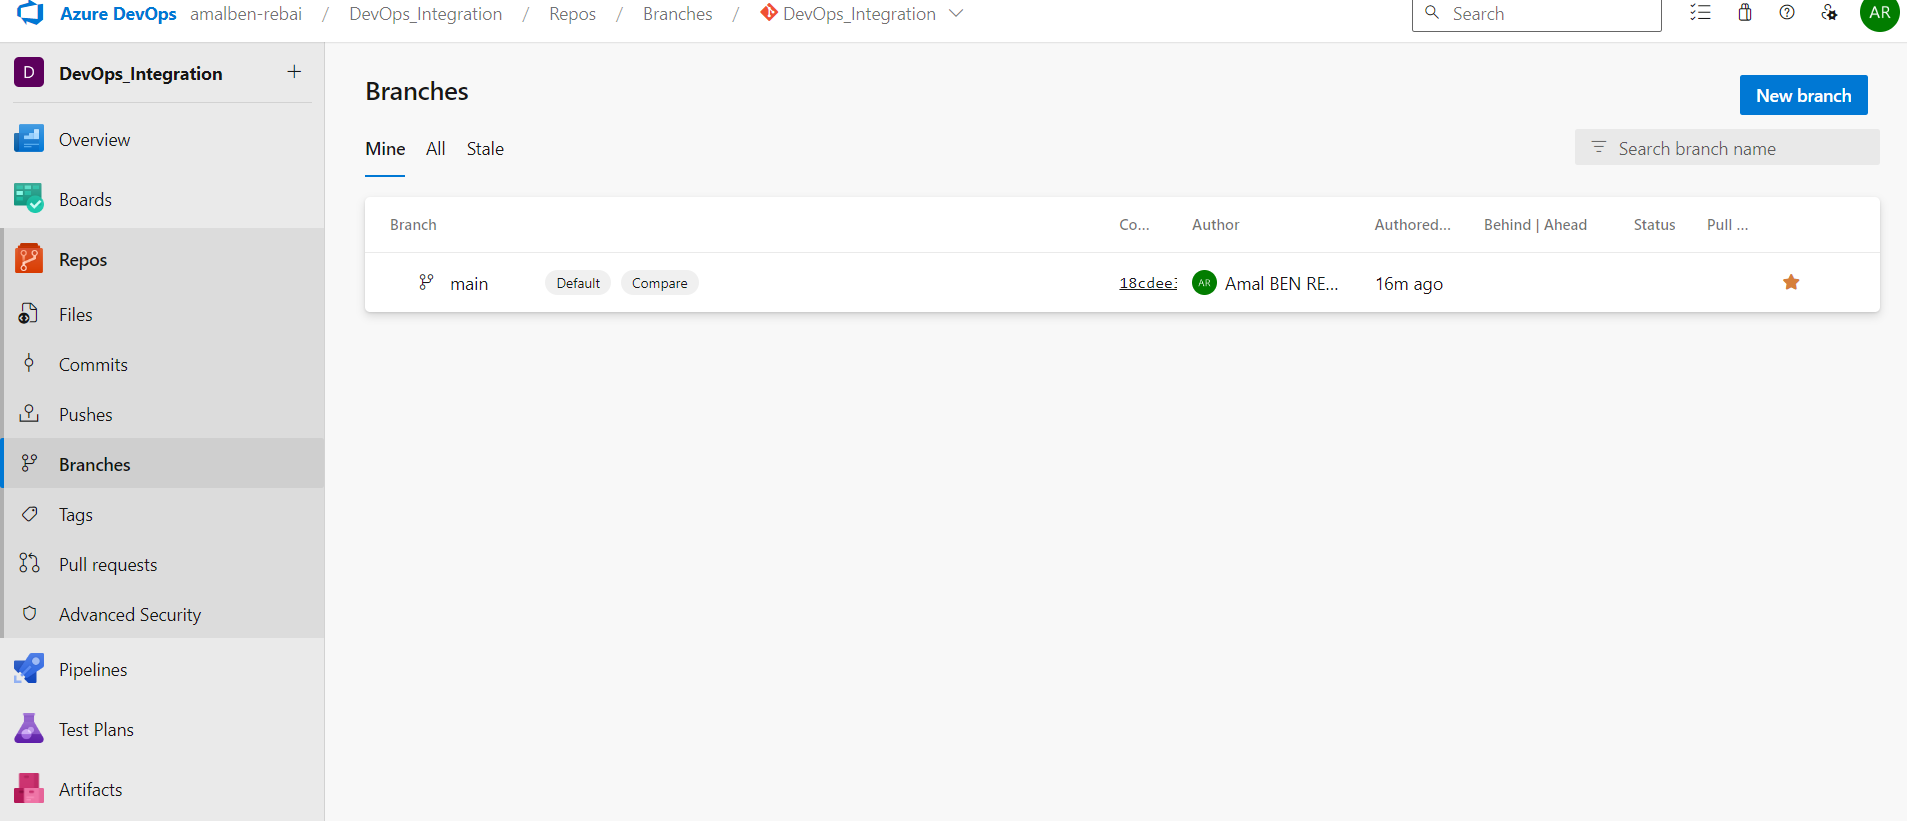
You can create a new branch dedicated to the changes for your data warehouse project. For me, I use the 'Main' branch to push my modifications from DevOps to the Fabric workspace, or vice versa
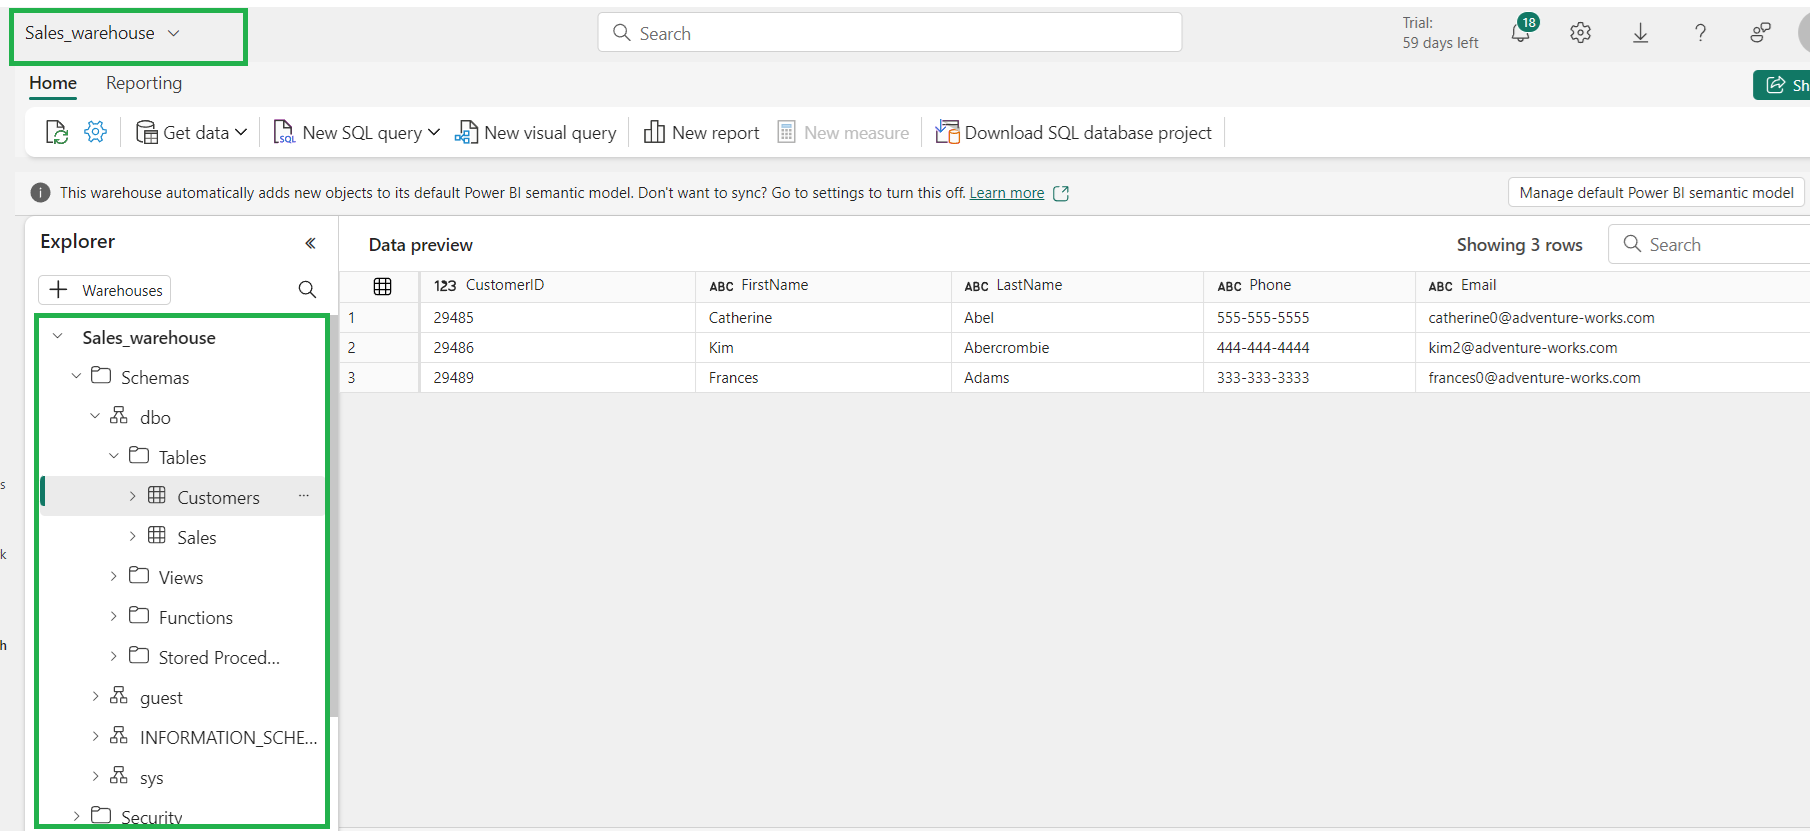
2) Navigate to the Data Warehouse to be synchronized from the Fabric Explorer:
In this example, I have created a data warehouse named 'Sales_Warehouse' that I will use in my tests to test source control synchronization between my Fabric workspace and the Git branch.
It contains two tables at the dbo schema: customers and sales.
3) Connect the Fabric Workspace to Azure DevOps Repo:
Go to Workspace settings and select Git integration. You'll be automatically signed into the Azure Repos account associated with your workspace.
From the drop-down menu, specify the following details of the branch you want to connect to:
Organization
Project
Git repository
Branch
Click on Connect and sync

After you connect, the Workspace displays information about Source Control that allows the user to view the connected branch, the status of each item in the branch and the time of the last sync.
👇Here we can see that my “Sales_warehouse” data warehouse was synced.

4) Navigate to Azure DevOps to explore the Git integration support for my synchronized Data Warehouse:
Navigate to the Azure DevOps Git repository connected to your workspace
Locate the data warehouse folder and expand the subfolder at the root of the repository to view its contents, reflecting the schema of your data warehouse as shown below:

5) Clone the Git Repository to a local folder using Visual Studio Code:
In this step, we'll clone the Git repository from Azure DevOps to a local machine, allowing us to work on the project offline.
To set up this cloning process, take the following steps:
Navigate to your Azure DevOps project
Click Repos => Clone button and the from the Clone Repository pane, click the Clone in VS Code button

Select a local folder to store the cloned repository files.

☝️We can note that my data warehouse repository was opened in VS code.
6) Push Fabric Data Warehouse updates with Git integration:
✅From DevOps (via VS Code) to the Workspace:
In this step, we'll simulate making changes to the data warehouse content, from the cloned copy of the DevOps repository using VS Code.
I created a new table named "Customers_new" by copying the SQL file from an existing table "Customers".

After saving my changes, I accessed the "Source Control" icon within VS Code and committed the updates to the Azure DevOps repository by writing a descriptive commit message.


✅From the Workspace to DevOps:
You can also make edits to the data warehouse schema directly within the workspace.
After saving your changes, use the Source Control pane to commit them to the connected Git branch.
7) Review and Pull Updates to the Fabric Workspace:
In the Azure DevOps interface, Click on "Repos" and then "Commits", to verify the committed changes.

👇The new table appeared correctly the my Azure DevOps Repos

Next, navigate to the Microsoft Fabric workspace to approve the update.
After committing the new change to my 'Customers_new' table in the connected Git branch, a notification appeared in the relevant workspace. Use the Source Control pane to pull the latest updates.

To update a workspace:
Go to the workspace and select the Source Control icon.
Navigate to the Updates tab in the Source Control pane. (A list will appear showing all the items that were changed in the branch since the last update)
Select 'Update All' to synchronize.
👇Afterward, I verified in the Warehouse Explorer that the schema for the new table was correctly added.

Voila! Your local changes made via VS Code are now reflected in your Fabric data warehouse, thanks to the seamless Git integration with Azure DevOps.
I hope that these steps for testing Git integration support for Microsoft Fabric Data Warehouses were helpful for you.
Summary:
By leveraging Git integration, you can establish a robust CI/CD pipeline for your Fabric data warehouses. This integration allows you to commit changes in Azure DevOps, trigger automated builds, and seamlessly deploy updates to your Fabric workspace, fostering a streamlined and efficient development workflow.
👉For more insights into Fabric Git Integration, Power BI PBIP Projects and Azure DevOps, you can read my post here.