Fabric Git Integration with Power BI PBIP Projects and Azure DevOps
Connecting Power BI to Azure DevOps
Introduction:
Git integration with Azure DevOps via Microsoft Visual Studio Code enables Power BI developers to work more efficiently on their Power BI projects, including development processes, source control and collaboration with Git repositories.
Microsoft Power BI Development Projects (PBIP) empowers Power BI developers to seamlessly collaborate through the integration with Azure DevOps. This is achieved by connecting their respective local Git repositories to Azure DevOps, ensuring efficient teamwork on shared projects
And recently the introduction of the Microsoft Fabric Git integration feature has allowed to seamlessly connect a Fabric workspace to an Azure DevOps Git repo, automating the synchronization and deployment of all your workspace content from DevOps to the Power BI Service or vise versa.
😀😀The synergy between Git and Azure DevOps, further boosted by the Fabric Git integration, provides the best of efficient continuous integration workflows between Power BI Desktop and the Service.
In this post, I will explain how to integrate Azure DevOps with Power BI Desktop by synchronizing your local machine with Azure DevOps repository and also with a Fabric workspace (=Power BI Service).
I will detail the steps on how to configure Azure DevOps, then how to synchronize it with your local machine in order to integrate it with your Power BI Desktop projects, and finally how to take advantage of the Git integration in Fabric to connect it to your Power BI workspace.
Prerequisites
To integrate Azure DevOps (Git) with your local machine and with your Microsoft Fabric workspace, you must meet the following prerequisites :
Install Visual studio Code + Git on your machine
Azure DevOps account
Fabric workspace (Fabric capacity or Power BI Premium licence)
Steps:
1) Create an Azure DevOps project :
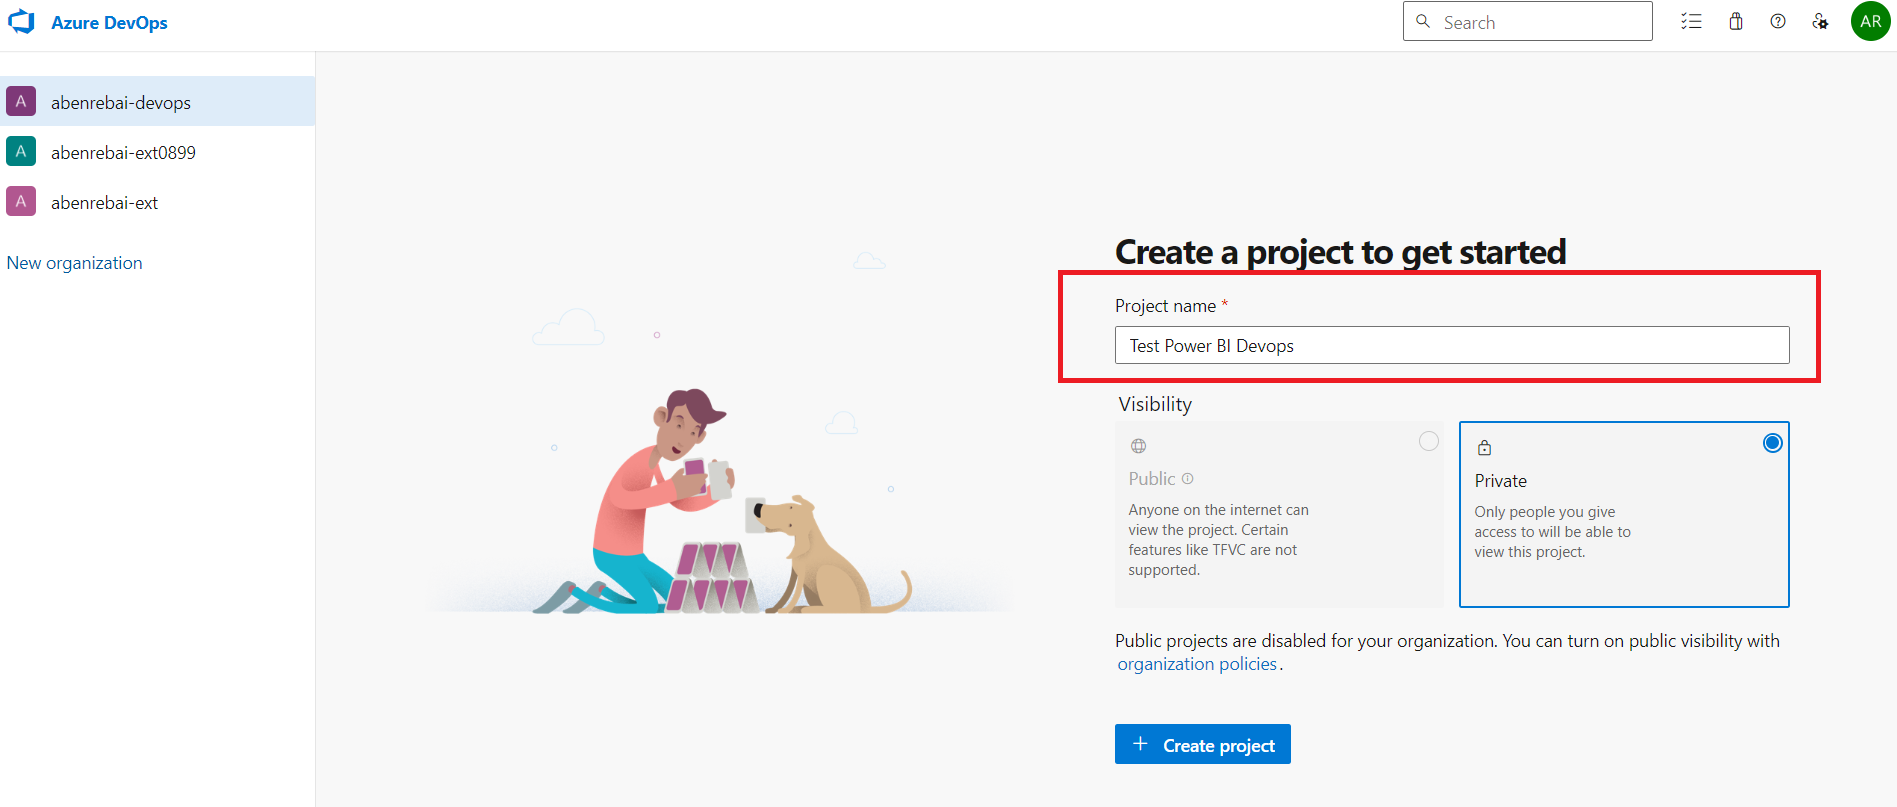
Navigate to dev.azure.com and create a new project, in my case I named it “Test Power BI DevOps”
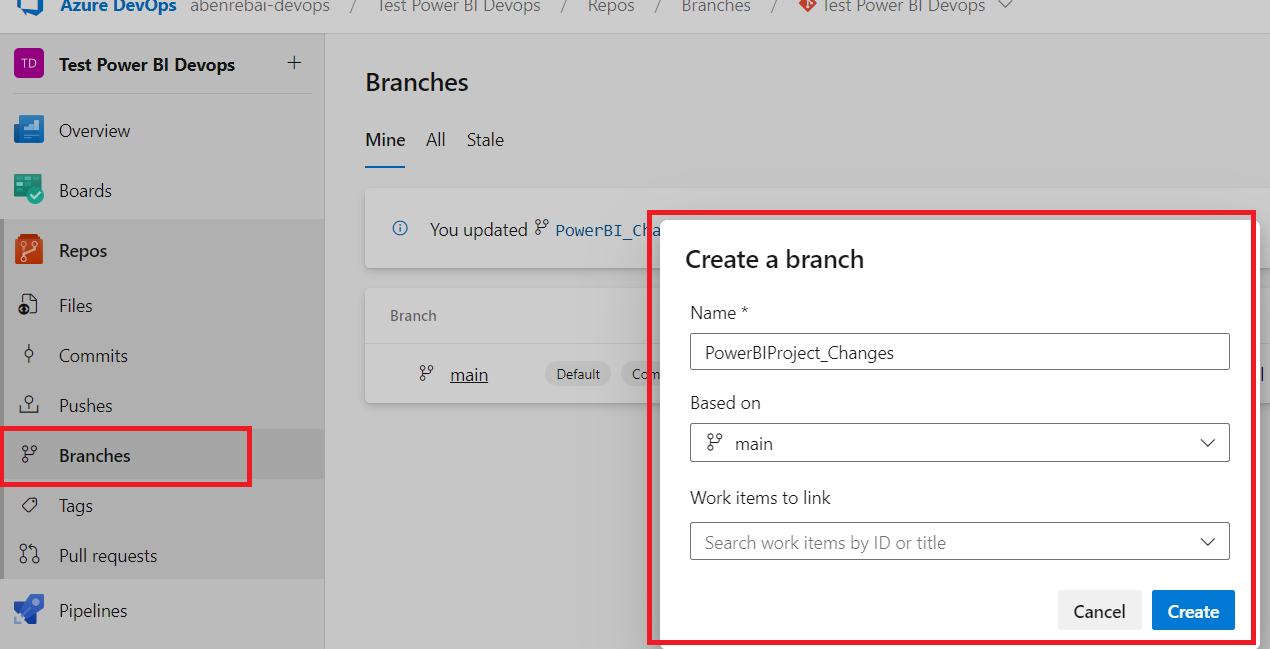
Initialize a main branch, by clicking on Repos => Branches= > Initialize
You can create a new branch dedicated to the changes of your power bi project.
For me I created a new branch that I named “PowerBIProject_Changes'“ based on the main branch
2) Create a local copy of a remote Git repo by cloning it into a local folder on your computer using Visual Studio Code:
In this step, you'll clone the Git repository from Azure DevOps to your local machine, allowing you to work on the project offline.
To set up this cloning process, take the following steps:
Navigate to your Azure DevOps project
Click Repos => Clone button and the from the Clone Repository pane, click the Clone in VS Code button
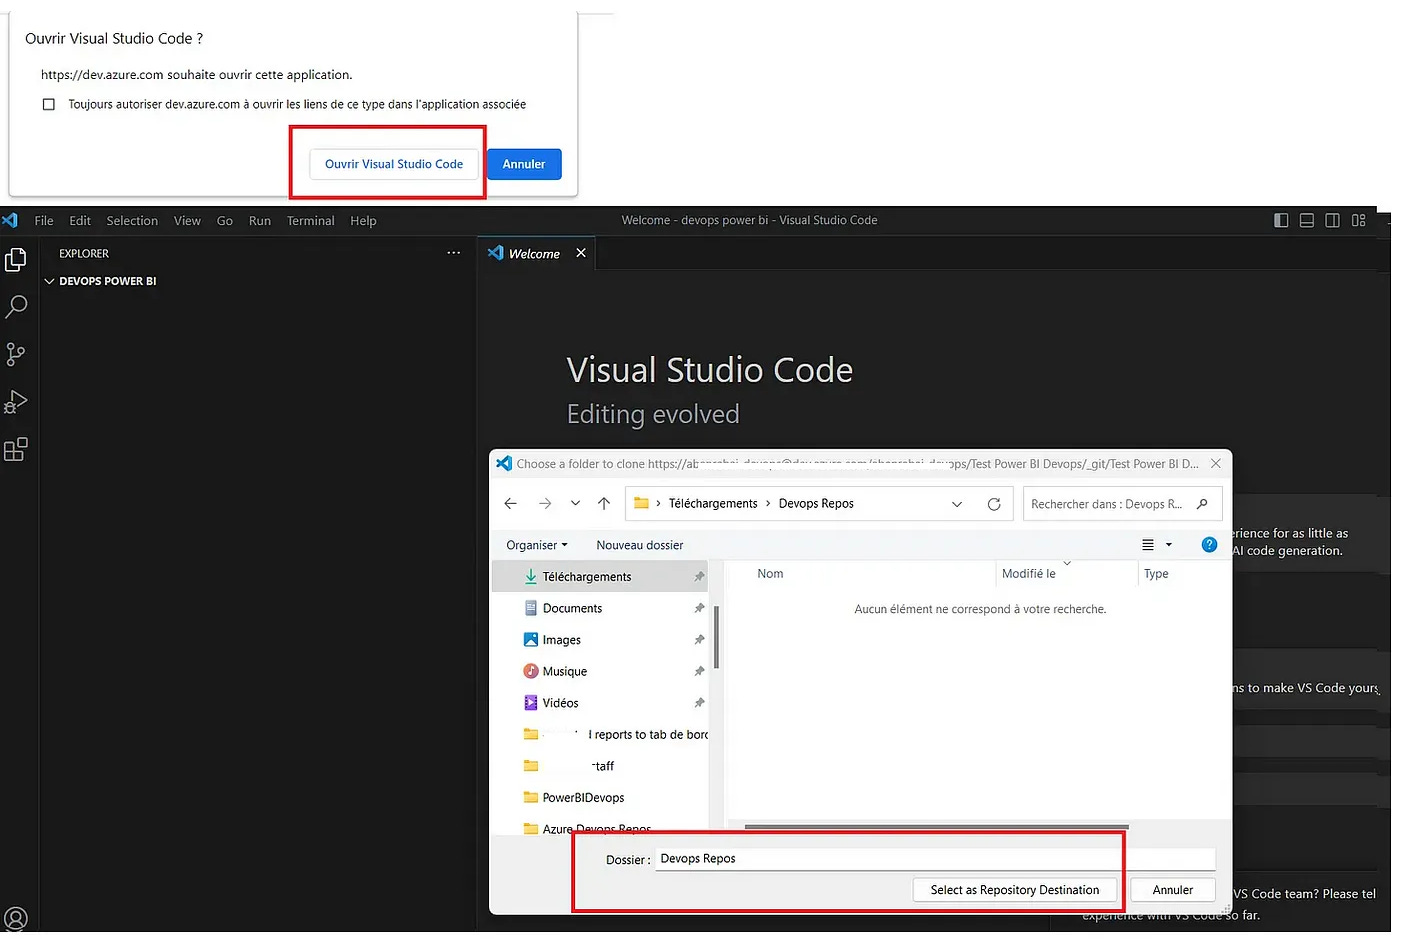
Choose Open Visual Studio Code
Select a folder as repository destination to clone Azure DevOps files, by clicking the Select as Repository Destination button
In my case I prepared a folder named “Devops Repos” for this propose
==>In Visual Studio Code, my Azure DevOps repositories were synchronized with my local computer and saved in the "Devops Repos" folder as a destination.
And my Azure DevOps project was synchronized in a sub-folder named "Test Power BI DevOps".that was automatically created in my "Devops Repos" folder with the same name as my DevOps project.
And my Azure DevOps project was synced into a sub-folder named "Test Power BI Devops" which was automatically created in my "Devops Repos" folder under the same name as my DevOps project.
👇The sub folder is opened in Visual Studio Code
3) Save the Power BI Desktop file as Power BI Project (PBIP):
Power BI now offers Developer Mode introduced with June 2023 release of Power BI Desktop, meeting the demands of enterprise BI customers for scalable solutions.
With this mode, you can save your work as a Power BI Project (PBIP), storing report and dataset definitions in text files. This text-based approach brings several advantages like Source Control, Continuous Integration and Continuous Delivery (CI/CD), Text Editor Support, Programmatic Artifact Editing.
You need to enable the Power BI Developer Mode in Preview features in power BI desktop “Options and settings”, then follow these steps:
Open your Power BI desktop project you want to synchronize with Azure DevOps. In my case I opened my report “Test Sales”
Save it as PBIB project file in the sub folder in question. For me I saved the Power BI file in the “Test Power BI Devops” folder which is synchronized with my Azure DevOps project
Once saving the pbix as a PBIP file in the same folder, the Visual Studio Code detects the changes in that folder and displays change notifications as bellow:
I committed the changes and named the commit step as "pbib saved".
4) Make changes on your Power BI Project:
In my case I modified my “Total Sales” measure DAX code and renamed it to “Total sales new”, then I saved the PBIP file
5) Commit changes detected by Visual Studio:
After modifying the measure, Visual Studio Code detects the changes made in the folder tracked by my local Git.
So, we can see that modifying the DAX formula of the measure in question has triggered a Git diff on the model.bim file 👇👇
Commit the modifications and publish them to Azure DevOps.
For me, I committed the changes by naming this step as "Modify Total Sales measure", and then I pushed it to Azure DevOps
In the Azure DevOps interface, Click on "Repos" and then "Commits", to see what you have submitted via Visual Studio.
6) Connecting Fabric Workspace git to Azure DevOps Repo:
I published the “Test Sales” report to Power BI Service in a Fabric workspace named “Sales Workspace”.
At this stage, I need to configure Git Integration from the Workspace Settings in order to synchronize the Workspace contents with the Azure DevOps repo, so I followed these steps:
Sign into Power BI Service and navigate to the workspace you want to connect with
Go to Workspace settings
Select Git integration. You’re automatically signed into the Azure Repos account registered to the Azure AD user signed into the workspace.
From the drop-down menu, specify the following details about the branch you want to connect to:
Organization
Project
Git repository
Branch
Click on Connect and sync
7) Commit changes from Git to the workspace:
Your workspace is now synchronized with your Git branch, so you can commit any changes you make in the workspace to the Git branch, or vice versa from Git to the workspace.
In this example I want to commit my Git changes to the workspace.
❗Note that each time we make a new modification to the connected Git branch, a notification appears in the workspace concerned.
Following the previous steps, I have made changes to the Git branch in Azure DevOps containing my measure modification and the notification has appeared as bellow:
To validate this change I need to update my workspace by following these steps:
Select the Source control icon.
Select the Updates tab of the Source control pane. A list appears with all the changes in the branch
Select Update all.
👏👏And I can now see that my published report has been updated with the "Total sales" measure changed to "New total sales".
😍 It really is magic: After making my changes locally and pushing them via Visual Studio Code to Azure DevOps, the changes were automatically reflected in the published report thanks to the Git integration with Power BI, as my workspace is synchronized with the Azure DevOps project.
Summary
So, to sum up, after establishing this seamless integration between Power BI and Azure DevOps, all you have to do is make changes in the local desktop, then validate and push them via VS Code to Azure DevOps, and magically, the published report will automatically contain the new changes.
😍😍This synergy between Git, Azure DevOps and a PBIB project is really the most wonderful feature that has been added to the world of Power BI.😍😍


Thank you Amel for this article! Fabric + GitHub integration is truly a game-changer for managing Power BI reports. It simplifies collaboration and version control.
However, I’m running into an issue with syncing one of my reports and can’t seem to pinpoint the cause. Have you encountered something similar or have any advice?
Also, are there any other limitations to the GitHub integration beyond what’s listed in the official documentation?
Thanks again for sharing, looking forward to hearing your thoughts!
Thanks for sharing Amel :) Do we need to have PBI premium for the Fabric workspace part?